
How to Record Video Using the GoPro HERO5
REMEMBER: You have complete control over which recordings you choose to share, including the option not to record or share any videos at all.
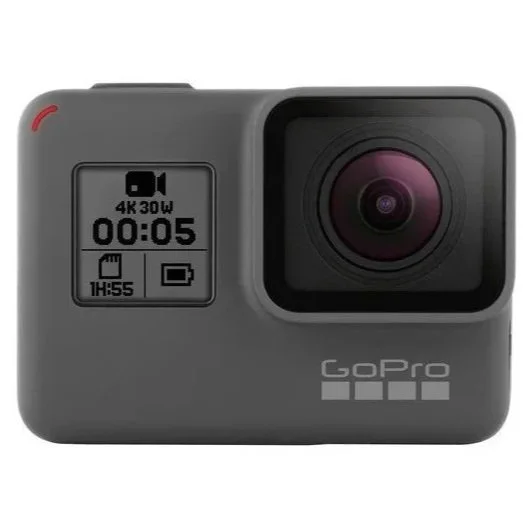
The GoPro HERO5 is set up to automatically start recording video when you press the red button on top of the camera.
Do not press any other buttons.
The provided memory card will hold approximately 14 hours of video.
1. Start and Stop Recording
To START recording:
Tap the red button on top of the camera ONCE.
The camera will turn on and automatically begin recording video.
A red light will blink while recording.
To STOP recording:
Tap the same red button ONCE.
The camera will stop recording and turn itself off.
Your video will automatically be saved.
IMPORTANT: Just TAP the red button. Do NOT hold it down. Holding the button can activate a different recording mode.
2. Charge the Camera
The camera has a rechargeable battery. The camera will record for approximately 90 minutes when it is fully charged. When the battery runs out, you can recharge it.
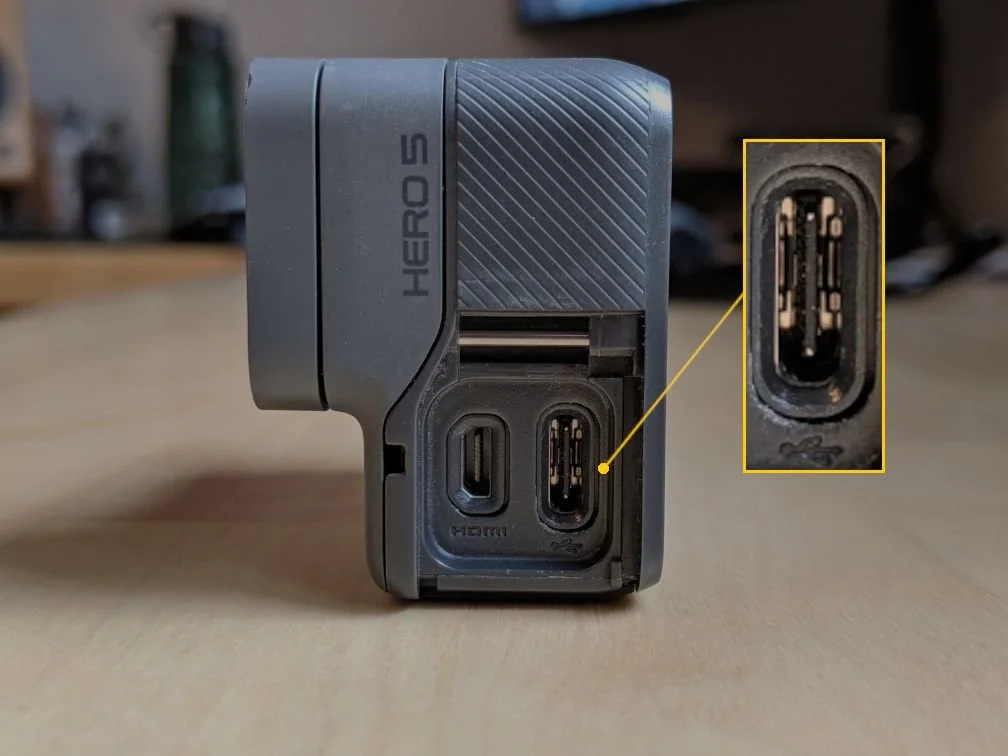
Find the USB-C port on the side of the camera. The protective cover has already been removed.
Plug the provided USB-C cable into the camera.
Connect the other end to a USB charger or computer.
A red charging light will turn on while the battery is charging.
The charging light will turn off when charging is complete.
Unplug the cable. The camera is ready to use again.
3. Remove the MicroSD Card to Review Videos
Your recordings are saved on a small memory card inside the camera.
Make sure the camera is OFF.
Turn the camera upside down.
Open the battery compartment door on the bottom.
Locate the small microSD memory card next to the battery.
Gently press the card inward until it clicks and releases.
Carefully pull the card out.
4. Review Your Videos on a Computer
A USB memory card reader is included with the camera.
Insert the microSD card into the card reader.
Plug the card reader into your computer.
Open the memory card using Finder (Mac) or File Explorer (Windows).
Open the DCIM folder to find your recordings.
Double-click a video file to watch it.
5. Delete Videos You Do Not Want to Share
You can review all recordings and delete any videos you would prefer not to share.
Watch the recordings on your computer.
Select any videos you do not want to share.
Move those videos to the Trash (Mac) or Recycle Bin (Windows).
Empty the Trash or Recycle Bin to complete the deletion.
Keep the videos you are comfortable sharing.
You are in control of which recordings you share, including the option of not recording or sharing any videos. Please review your videos before returning the memory card.
6. Put the Memory Card Back
Safely eject the memory card reader from your computer.
Remove the microSD card from the reader.
Make sure the GoPro is OFF.
Insert the card back into its slot in the camera until it clicks.
Close the battery compartment door securely.
Remember:
CLICK the red button ONCE to start recording.
CLICK the red button ONCE to stop recording.
NEVER hold the red button down.
Recharge the camera using the USB-C cable.
Review your recordings and delete anything you do not want to share.
Contact your director or assessor with any questions, including on how to return the camera and memory card.